Saturday, August 20, 2011

Pocket vents finished


A little more progress today. I'm waiting for the rest of the fumes to air out of the workroom before tackling the next part. I got the pocket vents finished and assembled. Once they've set for a little bit I'll paint them up and install. I've posted progress pics as I was building them. Hopefully this will help others in putting some together. They're easy to build and I'm not sure why I procrastinated so long to do them..
The pieces for the 'pocket' were made up with 2mm styrene while the ribs I improvised and built up using 1mm x3 to match the strips I'd gotten. Those turned out to be too wide when put side by side but worked out fine for the outer edges. The back plates are also 1mm. I curved the pieces to match the body by just simply bending them till they held a slight curve and I borrowed Edwardo's idea to use the utility arm to mark out the curve for the pocket pieces.


Thursday, August 18, 2011

Legs, Side and pocket vent progress

Well with summer for the kids over and time on my hands I got back in the workshop and finished cutting the legs pieces out. They still have the paper pattern attached for the moment so I know what layer is what. Just need to cut out the shoulder circles now.
 Next on the to do list was working on the side and pocket vents. The resin ones I have didn't fit the curve of the body and trying to warm them and bend them to the proper curve didn't work out either. So I decided to start from scratch with styrene. The side vents were the easiest to put together so I got them out of the way first. I used 1mm sheet for the front and .80x.25 strips for the ribs. Another 1mm sheet finished off the back.


Just need to paint them up and install them now then finish up the pocket vents.

Thursday, July 14, 2011

Starting on the legs

No photos this time around. I started rough cutting the leg pieces a couple of weeks ago then had a slight bump due to a broken bandsaw blade. I got back to work on them again today and I'm happy to say that 4 of them are now done. They just need some small detail work in the shoulder area. Will try to get back to work on the other pieces tomorrow or this weekend. After that they get skinned with some styrene.

Wednesday, June 15, 2011

Ports and redoing vents

Got back to work on my little R4 after a few weeks off.  I finished up painting the power couplers and got one installed on the back. Need to do some touch up where the red showed through on the edge. The octagon ports are also now installed with a bit of trimming to the frame so they could sit in the right spot.  Coin returns are also installed..

Got to thinking what I could do with the resin side vents and pocket vents. They just didn't want to fit and while warming them up allowed us to bend them slightly it also created more warp then helping them fit. So.. after much grumbling and digging through my stash of left over styrene I got to work on cutting out new ones. Just need to make a trip to the hobby shop tomorrow for a few things. And remember the paint scheme I have for them.

Tuesday, May 17, 2011

Painting the body

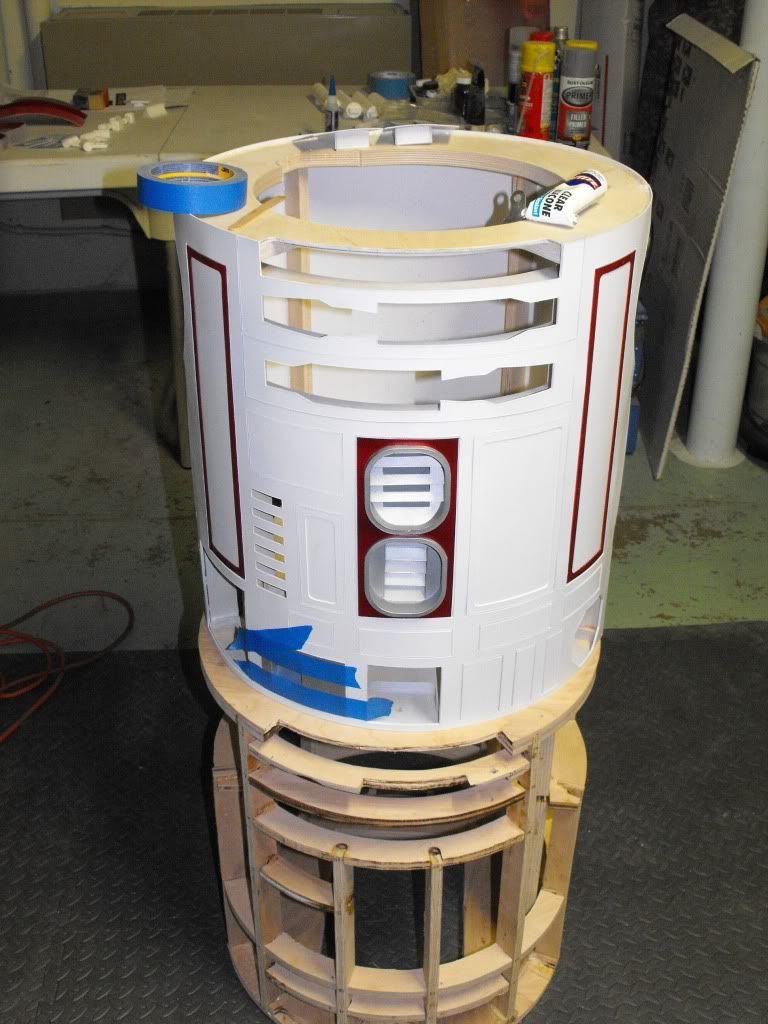
I spent the past weekend painting up the body section then started the process of fitting and gluing in the ports. Yes, that's a second frame she's sitting on.. or rather the first one I started with.

Thursday, April 21, 2011

Skins!

After a small set back with the frame.. had to redo it due to a slight backwards tilt that couldn't be fixed.. I finally got back on track and started getting the inner skins attached.
A few staples just to hold it in place then reinforced with silicon behind the skins where they meet the frame. Details from the outer skins went on next by using some 3M adhesive spray and touched up around the edges with thin CA glue.

Now to work on the back details. Trying to decide if I want to cut the back section to make a door or leave it as is and use the top for putting things inside.

Saturday, April 16, 2011

Inner support ring


Photo of floral rings I used for my styrene dome. These are 18" already so they only need a little bit of trimming after gluing them together to fit inside the dome for support.