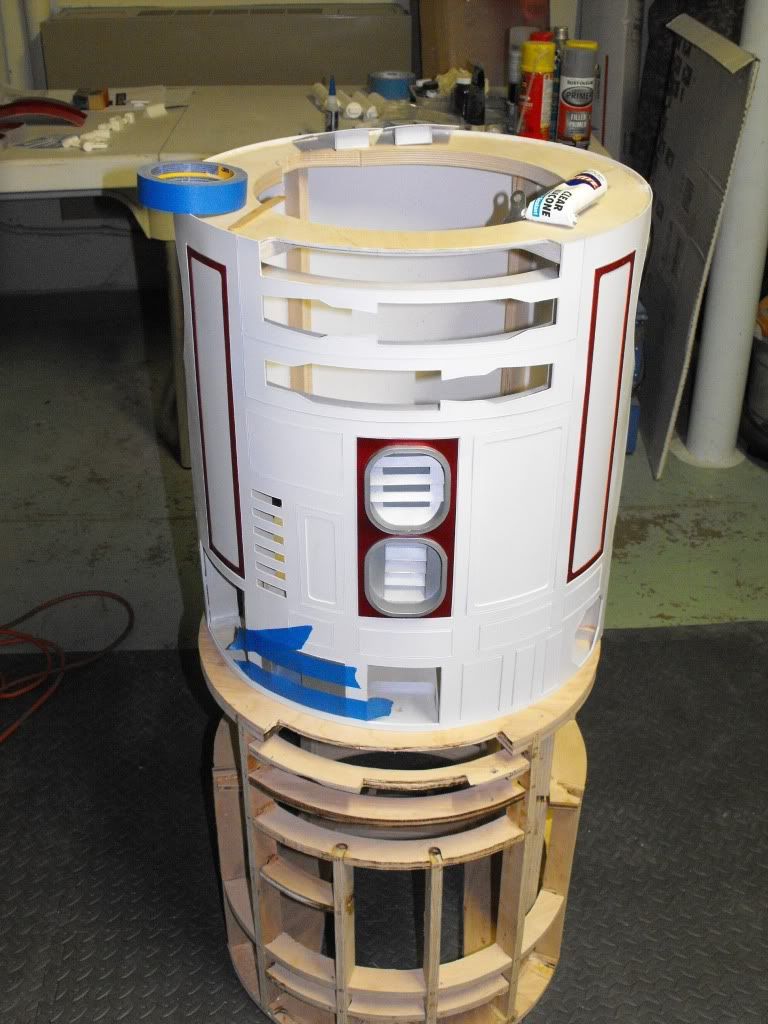
Got back to work on my little R4 after a few weeks off. I finished up painting the power couplers and got one installed on the back. Need to do some touch up where the red showed through on the edge. The octagon ports are also now installed with a bit of trimming to the frame so they could sit in the right spot. Coin returns are also installed..
Got to thinking what I could do with the resin side vents and pocket vents. They just didn't want to fit and while warming them up allowed us to bend them slightly it also created more warp then helping them fit. So.. after much grumbling and digging through my stash of left over styrene I got to work on cutting out new ones. Just need to make a trip to the hobby shop tomorrow for a few things. And remember the paint scheme I have for them.
Wednesday, June 15, 2011
Tuesday, May 17, 2011
Painting the body
I spent the past weekend painting up the body section then started the process of fitting and gluing in the ports. Yes, that's a second frame she's sitting on.. or rather the first one I started with.
Thursday, April 21, 2011
Skins!
After a small set back with the frame.. had to redo it due to a slight backwards tilt that couldn't be fixed.. I finally got back on track and started getting the inner skins attached.
A few staples just to hold it in place then reinforced with silicon behind the skins where they meet the frame. Details from the outer skins went on next by using some 3M adhesive spray and touched up around the edges with thin CA glue.
Now to work on the back details. Trying to decide if I want to cut the back section to make a door or leave it as is and use the top for putting things inside.
A few staples just to hold it in place then reinforced with silicon behind the skins where they meet the frame. Details from the outer skins went on next by using some 3M adhesive spray and touched up around the edges with thin CA glue.
Now to work on the back details. Trying to decide if I want to cut the back section to make a door or leave it as is and use the top for putting things inside.
Saturday, April 16, 2011
Inner support ring
Photo of floral rings I used for my styrene dome. These are 18" already so they only need a little bit of trimming after gluing them together to fit inside the dome for support.
Monday, March 21, 2011
Dome update
It's been awhile since I posted something. I've been working on little things like chipping out sections in the frame and dealing with paint that won't stick to some resin pieces. Removed the paint, sanded them down the best I could and now need to finish cleaning the last of the paint if I can so I can start over on them. Definitely a Grrrrr moment. Most of my progress has been on the dome though by getting the all the pieces finished up and the eye is now mounted. Yay!
Worked some more on it this morning and the panels are now attached as well as the HP's. Trying to figure out how to mount the pieces of plastic mik jug that I trimmed out for the PSI's now and how to attach a tube behind that for the lights that will go in later.
Lights! I'm planning on putting BlinkM's in the HP's and behind the PSI's. The logic displays will be fiber optics.. just waiting on all the supplies to arrive now. Last thing to go in will be a switch for the power that runs the lights. I'm thinking behind one of the dome bumps or the top pie panel.
Worked some more on it this morning and the panels are now attached as well as the HP's. Trying to figure out how to mount the pieces of plastic mik jug that I trimmed out for the PSI's now and how to attach a tube behind that for the lights that will go in later.
Lights! I'm planning on putting BlinkM's in the HP's and behind the PSI's. The logic displays will be fiber optics.. just waiting on all the supplies to arrive now. Last thing to go in will be a switch for the power that runs the lights. I'm thinking behind one of the dome bumps or the top pie panel.
Saturday, February 26, 2011
I've been a little busy the past few weeks. Mostly working on the frame and cutting here and there so the detail parts fit and getting those parts primed and painted. Inner skins are cut also to help give me an idea of where I need to trim the frame. For some reason when I was fitting the skins on they seemed a little too long.. like about a 1/4" too long. I double checked how deep the grooves were cut on the upper and lower rings and they're at 1/2" like they should be. Skins fit properly around the body so my guess is that the ribs might have been trimmed too short. I made up the missing measurement by adding 1/4" piece of birch to the bottom of the frame which seems to have worked out well.
Since the upper cross beam in the front was too thick instead of the 1/4" that it should have been.. I decided to try and work with it and trim out the section where the utility arm would be sitting. I'll be adding small block of styrene on top for the LDP to sit on when I install that piece.
Other spots that needed trimming were the top ring where the LDP sits, the areas where the octagon ports sit in the front and back and the pocket vents.
Since the upper cross beam in the front was too thick instead of the 1/4" that it should have been.. I decided to try and work with it and trim out the section where the utility arm would be sitting. I'll be adding small block of styrene on top for the LDP to sit on when I install that piece.
Other spots that needed trimming were the top ring where the LDP sits, the areas where the octagon ports sit in the front and back and the pocket vents.
Saturday, February 5, 2011
Frame build-up
For the past week or so I've been busy cutting, routing and putting the frame together. Finally got all the little joints glued up and she now has a nice sturdy body to work on. Next step.. skins.
Subscribe to:
Posts (Atom)